Fermilab’s online journals and subscription databases are accessible to Fermilab employees working off-site. Enabling Remote Desktop or using a proxy method will allow you to have full access identical to being at the lab. There are a few ways to do this as shown below.
Questions?
For questions about journals and subscription databases, or requests to have PDF’s of journal articles sent to you by e-mail, contact the Fermilab library.
- library@fnal.gov
- 630-840-3401
If any issues with the below steps, please contact the Service Desk.
- Submit a ticket
- servicedesk@fnal.gov
- 630-840-2345
Remote Desktop method
**Beginning mid-January 2020, any device connecting via VPN must be running Windows 10 or later. Devices running Windows 7 or earlier will be blocked from the Fermilab Network. Please contact the service desk with questions.
Step 1
You will either be remoting into a Fermilab computer at the lab or the Fermilab Windows Terminal Server (FERMI-TS). If you are currently using your Fermilab work computer outside of the Fermilab network, you will most likely connect to FERMI-TS. You can check if you have access by following the next steps. If you do not, contact the Service Desk to request the needed permissions for FERMI-TS.
You can also bring in your personal computer to the Service Desk, and they can set this up for you.
Step 2
Log into VPN to connect to the Fermilab network.
Fermilab VPN users are required to use multifactor authentication via a YubiKey or an RSA token.
To do so, you will need to follow the steps at: https://fermi.service-now.com/wp?id=kb_article&sys_id=KB0013046
Step 3
Open a Remote Desktop session.
Windows
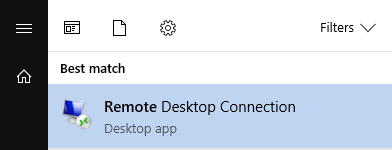
You can find the Remote Desktop Connection program via a Start menu search.
Or follow these steps based on your operating system:
- Windows 7&10: Select Start Menu->All Programs->Accessories->Remote Desktop Connection
- Windows 8 users, launch your Remote Desktop Connection client by selecting Start Menu. Enter the word “Remote” in search box, and hit “Enter.” (For Remote Desktop Connection.
- Windows XP: Select Start Menu->Programs->Accessories->Remote Desktop Connection
- Windows Vista: Select Start Menu->All Programs->Accessories->Remote Desktop Connection
- Windows command line: mstsc
Either enter “Fermi-TS.fnal.gov” or the IP address of the Fermilab computer you will be logging into on the Fermi network in the “Computer” field.
Now click Connect.
Step 4
Log in with your regular Fermi domain account to (choose one):
The Fermilab Windows Terminal Server — This requires access to the FERMI-TS server, you’ll need to contact the Service Desk to set that up.
Your office computer or some other computer at Fermilab — You need to know the name or IP address of the computer to do this. You will need to already have access and a user account to the computer you connect to at the lab.
For the User Name, enter your Windows Network (or “Fermi”) account name, and enter your password in the Password field. Make sure the, ‘Log on to:’ field says ‘FERMI’. If it does not say Fermi, type in FERMI\ before your account name in the User Name field. For example, if your user name is jsmith, you would type in FERMI\jsmith in the User Name field.

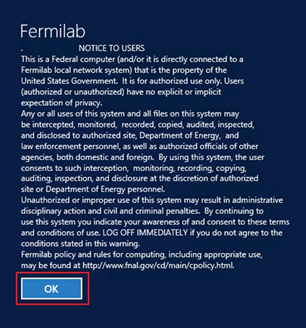
Select OK when you are prompted to accept the log-on banner.
Step 5
Once signed on, bring up a browser from the remote desktop, you should be able to download article PDFs now. As a test, see if you can view the following Physical Review D pdf.
For ease of access in the future, bookmark the Remote Desktop Connection application.
- Select Start Menu > Programs > Accessories
- Click and drag the Remote Desktop icon to your taskbar or desktop.
- Alternatively, you can right click on Remote Desktop Access and choose “Pin to Start Menu,” “Pin to Taskbar,” or “Send to” and choose “Desktop (create shortcut)”
Resources
In order to view the Knowledge Base articles below, you will need to first log into the Fermilab VPN.
Step 1
You will be remoting into a Fermilab computer at the lab or the Fermilab Windows Terminal Server (FERMI-TS). If you are currently using your Fermilab work computer outside of the Fermilab network, you will most likely connect to FERMI-TS. You can check if you have access by following the next steps. If you do not, contact the Service Desk to request the needed permissions for FERMI-TS.
You can also bring in your personal computer to the Service Desk, and they can set this up for you.
Step 2
Log into VPN to connect to the Fermilab network.
Fermilab VPN users are required to use multifactor authentication via a YubiKey or an RSA token.
To do so, you will need to follow the steps at: https://fermi.service-now.com/wp?id=kb_article&sys_id=KB0013046
Step 3
Open a Remote Desktop session.
Select Go>Applications>Microsoft Remote Desktop
If you don’t see the Microsoft Remote Desktop application, it can be downloaded from either Self Service or the App Store (https://itunes.apple.com/us/app/microsoft-remote-desktop/id715768417?mt=12.). Make sure you have the Microsoft Remote Desktop app (version 8.0.33 or higher) installed.
![]()
Create a new session by clicking New.

Step 4
Log in with your regular Fermi domain account to (choose one):
The Fermilab Windows Terminal Server. This requires access to the FERMI-TS server, you’ll need to contact the Service Desk to set that up.
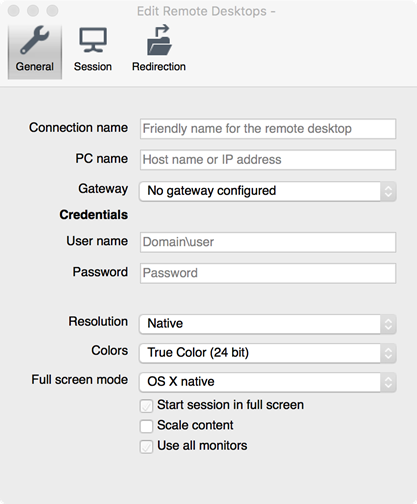
Enter “fermi-ts.fnal.gov” for both the Connection name and PC name fields. Close the window when finished.
Your office computer or some other computer at Fermilab. You need to know the name or IP address of the computer to do this. You will need to already have access and a user account to the computer you connect to at the lab.
Enter your SERVICES credentials, then select OK.
For the User Name, enter your Windows Network (or “Fermi”) account name, and enter your password in the Password field. Make sure the, ‘Log on to:’ field says ‘FERMI’. If it does not say Fermi, type in FERMI\ before your account name in the User Name field. For example, if your user name is jsmith, you would type in FERMI\jsmith in the User Name field.
Select OK when you are prompted to accept the log-on banner.
Step 5
Bring up a browser from the remote desktop, you should be able to download article PDFs now. As a test, see if you can view the following Physical Review D pdf.
For ease of access in the future, bookmark the Remote Desktop Connection application:
- Select Finder> Applications
- Click and drag the Remote Desktop icon to your taskbar or desktop.
- Alternatively, you can right click on Remote Desktop Connection and choose “Pin to Start Menu.”
Resources
In order to view the Knowledge Base articles below, you will need to first log into the Fermilab VPN.
Cisco VPN with iOS Devices (iPad and iPhone)
Installing Cisco AnyConnect VPN Client to a Mac – Using Safari
Step 1
You will either be remoting into a Fermilab computer at the lab or the Fermilab Windows Terminal Server (FERMI-TS). If you are currently using your Fermilab work computer outside of the Fermilab network, you will most likely connect to FERMI-TS. You can check if you have access by following the next steps. If you do not, contact the Service Desk to request the needed permissions for FERMI-TS.
You can also bring in your personal computer to the Service Desk, and they can set this up for you.
Step 2
Log into VPN to connect to the Fermilab network.
You need to do this as root.
Load in the vpn kernel module by typing the command
/etc/init.d/vpnclient_init start
Start the VPN.
NOTE: don’t do this in a window you plan on using unless you are going to put it in the background. If that is the case, put an & at the end of the command.
cd /root/

vpnclient connect cd_vpn
You will be asked for your user name and password.
It has been found that on some RedHat 9 based systems, with the proper combination of ‘compat’ libraries, that the recompiled vpnclient will not work. If that is the case copy the vpnclient from the tar file over to replace the recompiled vpnclient.
cp /tmp/vpnclient/vpnclient /usr/local/bin/vpnclient
Step 3
Open a Remote Desktop session by opening a terminal window and running this command:
$ rdesktop fermi-elh.fnal.gov -u username -d fermi
NOTE: Here, username is your Kerberos principal/account name. This command has been tested with rdesktop 1.6.0 and 1.7.2. If you experience any problems connecting to the Windows Terminal Server, please update your RDC client to the most current version in your Linux distribution.
Step 4
Log in with your regular Fermi domain account to (choose one):
The Fermilab Windows Terminal Server. This requires access to the FERMI-TS server, you’ll need to contact the Service Desk to set that up.
Your office computer or some other computer at Fermilab. You need to know the name or IP address of the computer to do this. You will need to already have access and a user account to the computer you connect to at the lab.
For the User Name, enter your Windows Network (or “Fermi”) account name, and enter your password in the Password field. Make sure the, ‘Log on to:’ field says ‘FERMI’. If it does not say Fermi, type in FERMI\ before your account name in the User Name field. For example, if your user name is jsmith, you would type in FERMI\jsmith in the User Name field.
FNALU
How to open a Remote Desktop session by logging onto one of the FNALU nodes, export your display, and run the following two commands:
- $ setup rdesktop
- $ rdesktop fermi-elh.fnal.gov &
Step 5
Bring up a browser from the remote desktop, you should be able to download article PDFs now. As a test, see if you can view the following Physical Review D pdf.
Resources
In order to view the Knowledge Base articles below, you will need to first log into the Fermilab VPN.
Installing VPN for use on Linux
Proxy method
- Download FoxyProxy for use with the Firefox browser.
- Once that is installed and integrated with Firefox:
- Tools -> FoxyProxy Standard -> More [may not be there, depending on version] -> Options
- Add New Proxy
- General
- All boxes: checked (but not the “Cache” and “Cookies” boxes)
- Proxy Name: whatever you want, e.g. FNAL
- Proxy Notes: ssh -D 9999 your_user_name@fnalu.fnal.gov (can also log into your office machine)
- Proxy Details
- Manual Proxy Configuration: checked
- Host or IP address: localhost
- Port: 9999 (free to choose here but must match “Proxy Notes” above)
- Socks Proxy: checked
- Socks v5: checked
- OK [might click this after “URL patterns”, depending on version]
- URL patterns
- Doesn’t matter, if you leave it blank all web pages will go through the Fermilab machine named above while you are using Firefox, if you have this proxy, FNAL (see “Proxy Name” above), selected.
- General
- Now to get it running:
- Create an ssh tunnel into the machine named above in “Proxy Notes” using Putty or a shell
ssh -D 9999 your_user_name@fnalu.fnal.gov
may require cryptocard to access - Tools -> FoxyProxy Standard -> More -> Options [final two may not be there, depending on version]
- Select your new proxy, FNAL:
Mode: Use proxy “FNAL” for all URLs
- Select your new proxy, FNAL:
- Create an ssh tunnel into the machine named above in “Proxy Notes” using Putty or a shell
- You’re done! You should now notice a little fox face in the bottom-right hand corner of your browser border. The color should match the color selected in the “Options” menu (default is blue but you can change it, which is nice if you have more than one proxy setting). As a test, see if you can view the following Physical Review D pdf.
- In a terminal (e.g. “xterm” or other command-line shell application), do
ssh -D 9999 your_user_name@fnalu.fnal.gov
or replace “fnalu.fnal.gov” with any other FNAL machine on which you have an account. - In your Firefox browser’s config page (enter “about:config” into the address bar, click “okay” on the warning), change the following settings:
network.proxy.socks 127.0.0.1 network.proxy.socks_port 9999 network.proxy.socks_remote_dns true network.proxy.type 1 - To turn off the proxy (send and receive web traffic through your computer directly, without sending it to Fermilab first), reset network.proxy.type to its default value (right click in about:config gives you a “reset” option) and type control-C in the terminal to stop ssh.